
(Almost) stress-free Wedding Cake Deliveries!
- Isabelle Boizis

- Oct 29, 2022
- 5 min read
Updated: Jun 29, 2023
Disclaimer: when you click on an affiliate link within my blog posts or website, I may earn a commission if you make a purchase using that link. These commissions are typically a small percentage of the total sale. Rest assured, this does not affect the price you pay for the product or service; it is simply a way for me to earn a small compensation for the time, effort, and resources I invest in creating valuable content for you.
If you're a cake designer, you know how daunting cake deliveries can be! I personally dislike them very much, but have learnt to make them as smooth and safe as I possibly can.
I've made a couple of Reels (and a few more Stories) on Instagram about how I do it. And those literally blow up every time! So many comments, DMs about where do I get my gear and so on.
So I thought it would be a great idea to share with you all how I do it a bit more in details, and give you my 4 best tips for a as-smooth-as-possible Wedding Cake delivery (obviously, things happen and these tips can not guarantee a no-fail delivery I'm afraid. But it should at least help you with some peace of mind before-hand!).
Before we get started, please note that I use a “normal” car (understand - not a delivery van!) so those tips are adapted to actual cars.
I hope you find this helpful!
#1 TIP - Upholstery Foam Pads
If I had to chose only ONE element from this whole list to do my deliveries, this would be it!
Using foam pads gives you security as they are anti-slip, but they also absorb the shocks of the road. They're an absolute must-have for any safe cake deliveries! For them to work best, your boot needs to be lined with carpet (like a normal car boot basically) for optimal grip and make them totally anti-slip and keep your cake boxes nice and sturdy on top while being fixed to the carpet.
You can find some by clicking on the link here. You can also find them in many craft/diy shop. My boot is quite large which allows me to line it with 4 pads of about 5cm thick whcih is the minimum thickness I would recommend.
Have you seen my Reel about this on Instagram? Check it here, you'll see how I do it!
#2 TIP - Thermal Boxes
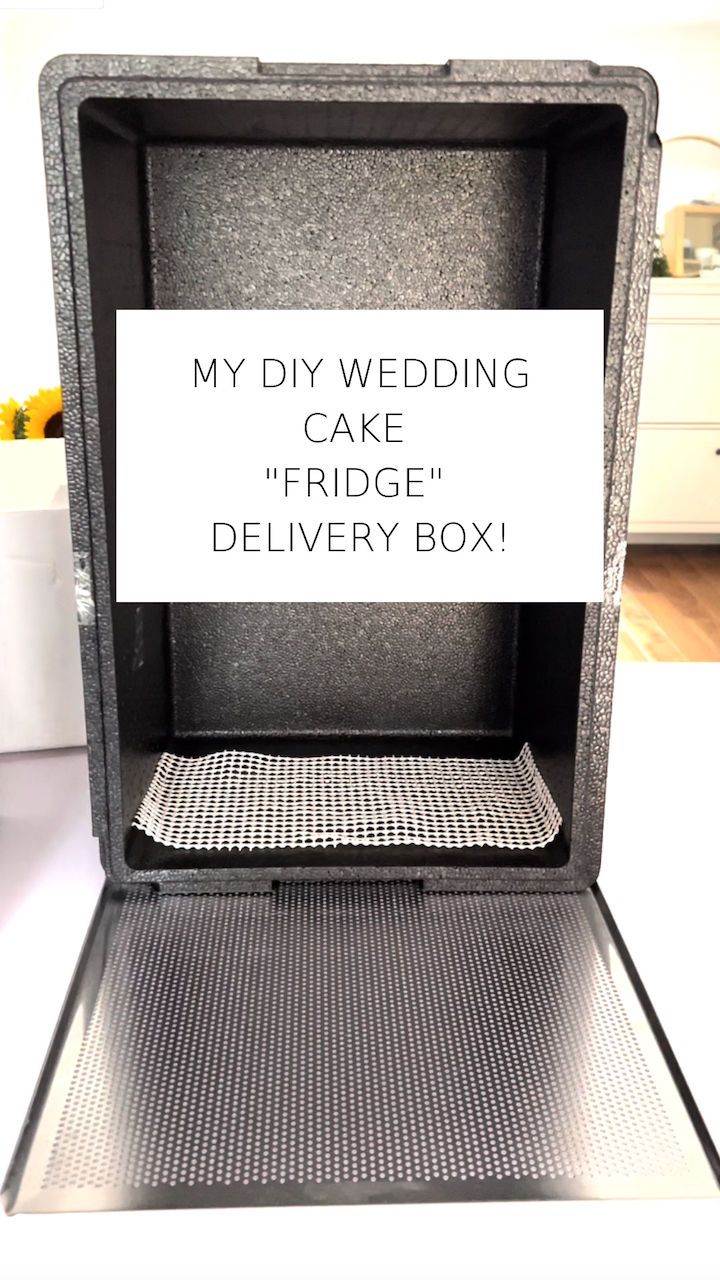
This is also one of the best investments I've made for my cake deliveries, and this + the foam pads combined have completely changed my cake delivery game for the best!
I now use a Cambro 80L thermal box which you can find HERE which should be able to contain a 12" base board + 3 tiers on top of that (or 2 tiers with extra tall cakes) - this is much more simple as it requires only the one box, so highly recommend.
Until then, I used to stack together two boxes (as shown on this Reel), although I still use these the "normal way" to transport unstacked tiers as it is super practical to be able to transport 2-3 tiers in one go.
The 80L Cambro definitely has the best of both - it fits 2-3 stacked tiers, it is slightly taller than the boxes I used to use so it also works for taller tiers (although you would certainly not be able to fit a 4 tiers, unless it was made of shorter tiers!).
But the thing is, it is much easier to transport 2 or 3 tiers already stacked and secure, with a single tier on the side to stack at the last minute on site, than having to travel with a fully dismantled cake to stack up at the venue. Feel me?
I also know that some brands have created practical thermal boxes, such as stackable pizza boxes which you can adjust to different height by adding or removing panels before closing it with a lid, or the super famous Cake Safe delivery solution which I haven't tried but think it looks amazing, although definitely more of an investment (I believe about £325 for a 3 tiers cake with tall tiers or 4 tiers with shorter tiers).
My two boxes “diy fridge" system cost me about £100 in total - which includes the two boxes + the 60x40cm tray to go underneath for ease of transportation and the larger Cambro version costs £95 on Amazon and you basically need nothing else!
To conclude: you need a good boxing system for (almost) stress-free cake deliveries! Plenty of solutions out there, for different budgets and now you only have to work out what works for!
#3 TIP - The logistics of it all!
When confirming a cake booking, I send all my customers a logistics form with as many details I can get from them for the delivery day:
Best contact person on site: wedding planner, person in charge,…
Venues details: address, phone number.
Venues layout: will the cake be set up in the Breakfast room or in the same room as the ceremony, etc.
Timetable for the day: what time does the ceremony starts, what time will guests start arriving (from there I count to have everything set up and ready at least an hour before they do!).
A reminder for the cake stand: will they return it in person or by post/courier (in which case I provide them with a safe return box).
All these details help me to prepare for the day, sometimes a phone call the day before is most welcome to confirm all these details, specially if you are not familiar with the venue (is there parking for suppliers for example? - not always the case arghhh!!!).
I also make sure to enter the address on my satnav to figure out how long it will take me to get there the next day. This is also great as on the day I only have to press “recent searches” on Maps to get it ready with a simple click. Anything to make my life easier on delivery day!
#4 Tip: Wedding details & Allergens List Sheet!
This is something I have crafted (and got professionally printed on lovely paper with my logo and brand colours to keep that branding consistency) which means that on the day I only have to fill the details (date, customers names, venue's name, tiers flavours + details on any extras - favours, sweet table, etc), tick the allergens boxes, and hand it to the wedding planner (or whoever is in charge).
Please tell me: would you be interested in purchasing pre-made Allergen and Wedding Info sheets that you could adapt to your own branding if they were available on my website? I'd like to know, so don't hesitate to hit reply! In fact, anything you would like to suggest in terms of products and classes you'd like to see on my website, let me know by commenting below, or email me here !
I do note and take every opinion into account to create new stuff!!!!
I do hope you enjoyed this post! If you try any of these tips, feel free to tag me on socials as I LOVE to see your work and share it with my community!
As always, with love,
Zaza x


If you are seeking a photographer in New York, Wezoree will facilitate your inquiry with remarkable ease. You may engage with highly qualified experts who diligently document every moment through their website. There are professionals available who can cater to your every requirement, whether for a wedding, engagement, or other significant event. You are empowered to make a well-informed decision through the utilization of the extensive assessments and portfolios, thereby ensuring unparalleled experiences. Wezoree is the location to go if you want to discover the finest photographers in New York City! Learn more on Wezoree about it.